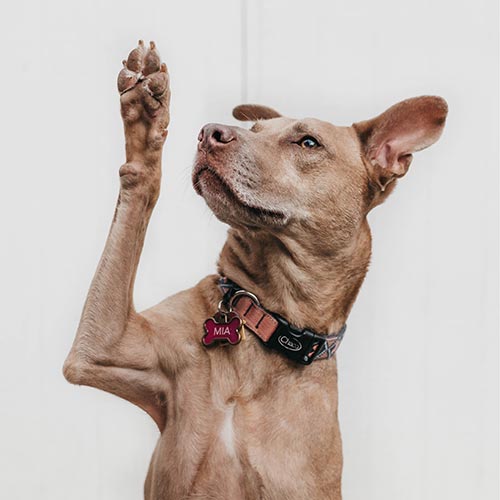
Any pet lover will tell you that their dog, cat or pet is their fur baby. They live with your family for years and are just as important as any other member of the family.
Recently I’ve had more and more people asking me for pet keepsakes. Precious memories of their dog, cat or other pets, that they’ll be able to keep as a memory forever. Celebrations of life or pet memorials as they near the end of their life.
So I’ve got 3 top tips on how to do a pet paw print for you so that you can create a precious memory.
As well as photos and videos, it’s so precious to keep a lasting memento of your pet’s paw print and even their nose print.
Did you know that your pet’s nose print is as individual as our fingerprints?
You can keep the paw print in a memory book, scrap book, memory box or add it to a photo frame.
The best way to make your pet’s paw prints is with my Pet Inkless Print kit – it’s clean, easy and mess free!

Dog Paws
Our dog’s paws are pretty amazing. They are weatherproof, but also sensitive to heat. Made up of 5 parts, did you know that dogs have thumbs (also known as the Dewclaw)? They actually walk on their toes and sweat through their paws. And each dog breed has different paw shapes. For example, the St Bernard has wide paws to grip on the snow and ice. Whereas a Greyhound has long middle ‘toes’ to help them run faster.

Cat Paws
If you’re paying attention, you’ll notice that your cat’s front paws have five ‘toes’ and their back paws only have four. They use their paws like scouring pads by licking the paw and then using it to clean their body. They have secret scent glands hidden between their ‘toes’ – so when they kneed or pad your lap, they’re leaving behind a bespoke mix of pheromones that are undetectable by humans but let other cats know that this spot is claimed.

Your Pet’s Nose Print
Did you know that your dog or cat’s nose print is as individual as our human fingerprints? You will notice little bumps and ridges on their nose which are as individual your your fingerprints. Since 1938, the Canadian Kennel Club has been accepting nose prints as one form of unique identification for a dog, according to the Calgary Humane Society.

You can see how precious it is to capture your pet paw print and nose print as a lasting keepsake. Vets will often take a paw print and nose print for you in the sad situation of your pet’s passing. The nose print is usually filled with character and is a really lasting memory of your precious fur baby’s face and character.
If you have a pet paw print or nose print already, you can email a photo of it to me and I can create a beautiful, lasting keepsake for you to keep and treasure forever. From personalised pet keyrings to framed enamel prints.
Your fur baby can even be added to my Family Handprint frames.
So without further ado, let me help you with my 3 top tips on how to do a pet paw print
How to do a pet paw print – my 3 top tips

1. Use an inkless print kit
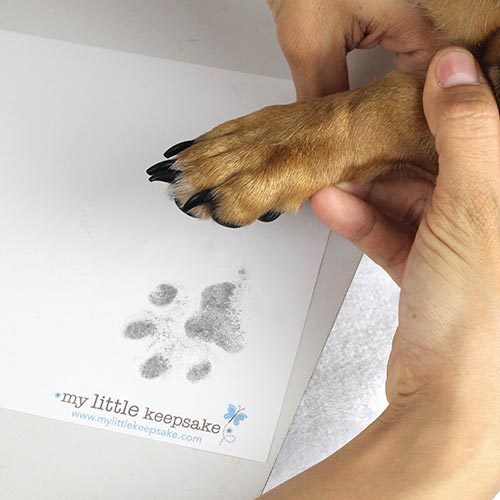
A pet inkless print kit makes life so much easier when doing your pet paw print. As the name suggests, there is no ink or paint, so there’s no mess and no fuss! It doesn’t matter if your pet runs off during the process. They won’t make paw prints all over your furniture or house!
You just wipe the magic, inkless wipe onto your pet paw and then press the paw into the special paper. Then as if by magic, your pet’s paw print will appear on the paper. Then re-wipe the paw with the special wipe and repeat the process.
You can do all of the paw prints multiple times and it’s a memory you’ll have to cherish forever.
Watch my video which shows you how to make a pet paw print using one of my inkless print kits

2. Have a helper
You may be tempted to open your inkless print kit straight away and use it on your own to get your pet paw print. But you’ll find it much easier if you have someone to help you. Ask your helper to hold your pet in a comfortable position. This will give you 2 hands to wipe your dog or cat’s paw and then press it onto the paper.
My inkless print kit instructions and video will show you how to do this more clearly.

3. Practice, Practice, Practice
Before you open your pet inkless print kit practice doing the paw print with your pet. Find the position that you, your helper and your pet find most comfortable.
This will depend on the size and temperament of your pet. For example:
– sitting your pet on a table top – you’ll have a nice firm surface to put the printing paper on (as in my video)
– put your pet on your lap – you’ll need to put the paper on a firm surface like a book or clip board
– sit your pet on the floor – you could put the paper on the floor, or a book/clip board may be more portable
By practicing, you’ll work out the best position for all of you to be in and you’ll also get your pet used to the feeling and process of having their paw print done. If your pet is a bit uncertain about the whole process, you could try doing it while they’re asleep.
Practicing will make you much more confident about doing your pet paw print. It will also ensure that you don’t waste your inkless wipe and paper. Only open the kit when you’re well practiced and you know what you’re doing!
What if my pet won’t let me do the paw print?
If you follow the steps above and use one of my Inkless Print Kits you should get some really successful prints.
Some people are worried that their pet – especially cats – won’t let them do a paw print.
So, some important things to remember are:
1. don’t get frustrated with your pet if it isn’t playing ball! Keep the practice sessions short and reward your pet with a treat when they get it right. Over time they’ll become more familiar with the process and go along with it more easily.
2. if you’ve opened the wipe and your pet isn’t co-operating, you can fold up the wipe and put it back in the foil sachet. Fold over and tape up the top and wrap it in some cling wrap to keep it airtight. Then come back later to have another go. As long as the wipe hasn’t dried out, been licked or chewed … keep it as airtight as possible – and it should last well for another go later.
3. for pets that aren’t keen on being held or made to do things they don’t like – don’t worry – the printing process is very quick. You only need to press the paw down for a second. Just press firmly and give it a little roll from side to side if possible. But just do one print – follow the steps above with your wipe – and then do another print later
Remember remember
When using the pet inkless print kit – always wipe your pet’s paw again before every print. The magic works as a reaction between the inkless wipe and the specially coated paper. So you need a fresh coating of the wipe on the paw before every print, so that they all appear nice and dark.
I hope you’ve found my top tips on how to do a pet paw print, really useful.
Pop over and check out my Pet Inkless Print Kit page for more useful info and a fantastic instruction video.

